How to add a related field to the view?
Adding a related field on CloudOffix
In CloudOffix, Adding a related field is so easy and the design is user-friendly.

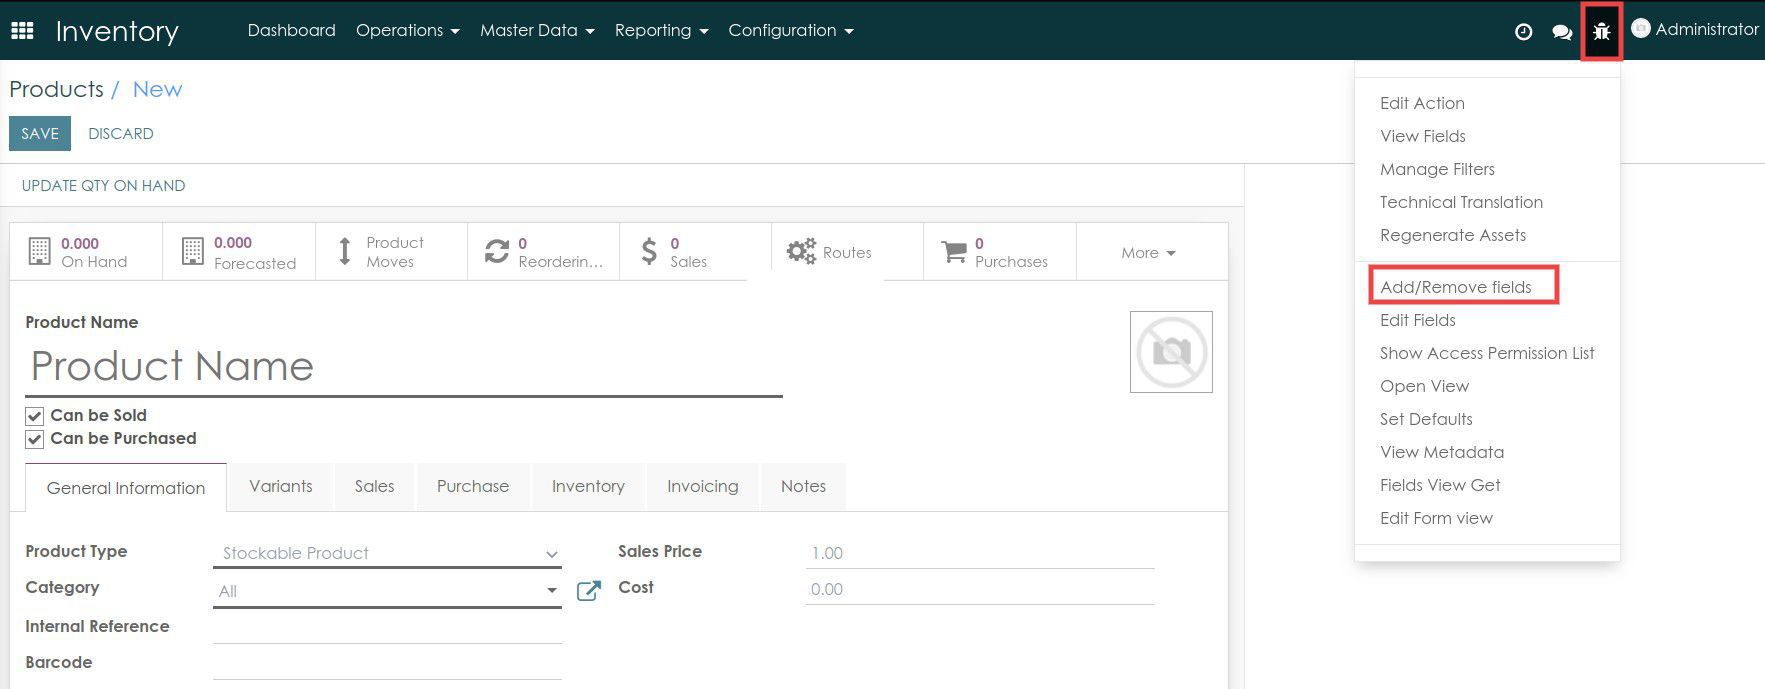
Open the form view of the model where the new field will be added/removed. The example given here is the Product form view. Click the "Add/Remove fields", to open the popup screen as shown below.

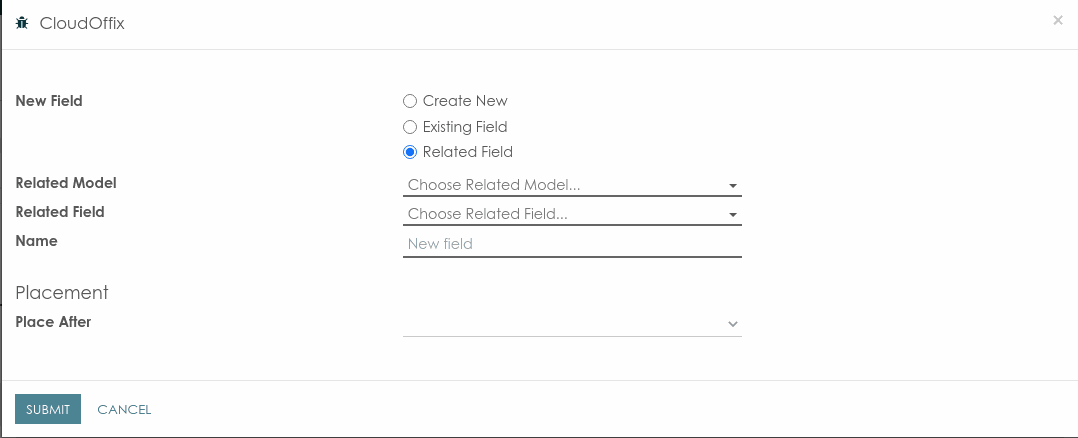
Select the "Related Field" option as shown above. Select the Related model from the "Choose Related Model" dropdown list. Then, select the Related field from the "Choose Related Field" dropdown list. The name of the field must be written in the "Name" property. The location of the field can be specified in the "Placement" property. Your new field will be placed after the selected field. Then click the "SUBMIT" button. The new field will have been created and displayed.
