How to create a custom workflow using the Admin Panel?
Workflow on CloudOffix
CloudOffix allows easy creation of workflows on any model by offering the freedom and flexibility to add buttons, assign actions to those buttons to suit your needs. It is possible to perform such actions in a short time due to the easy use of CloudOffix.
Let's take a look at how to create a workflow in CloudOffix.
Firstly, install the Admin Panel shown in the picture

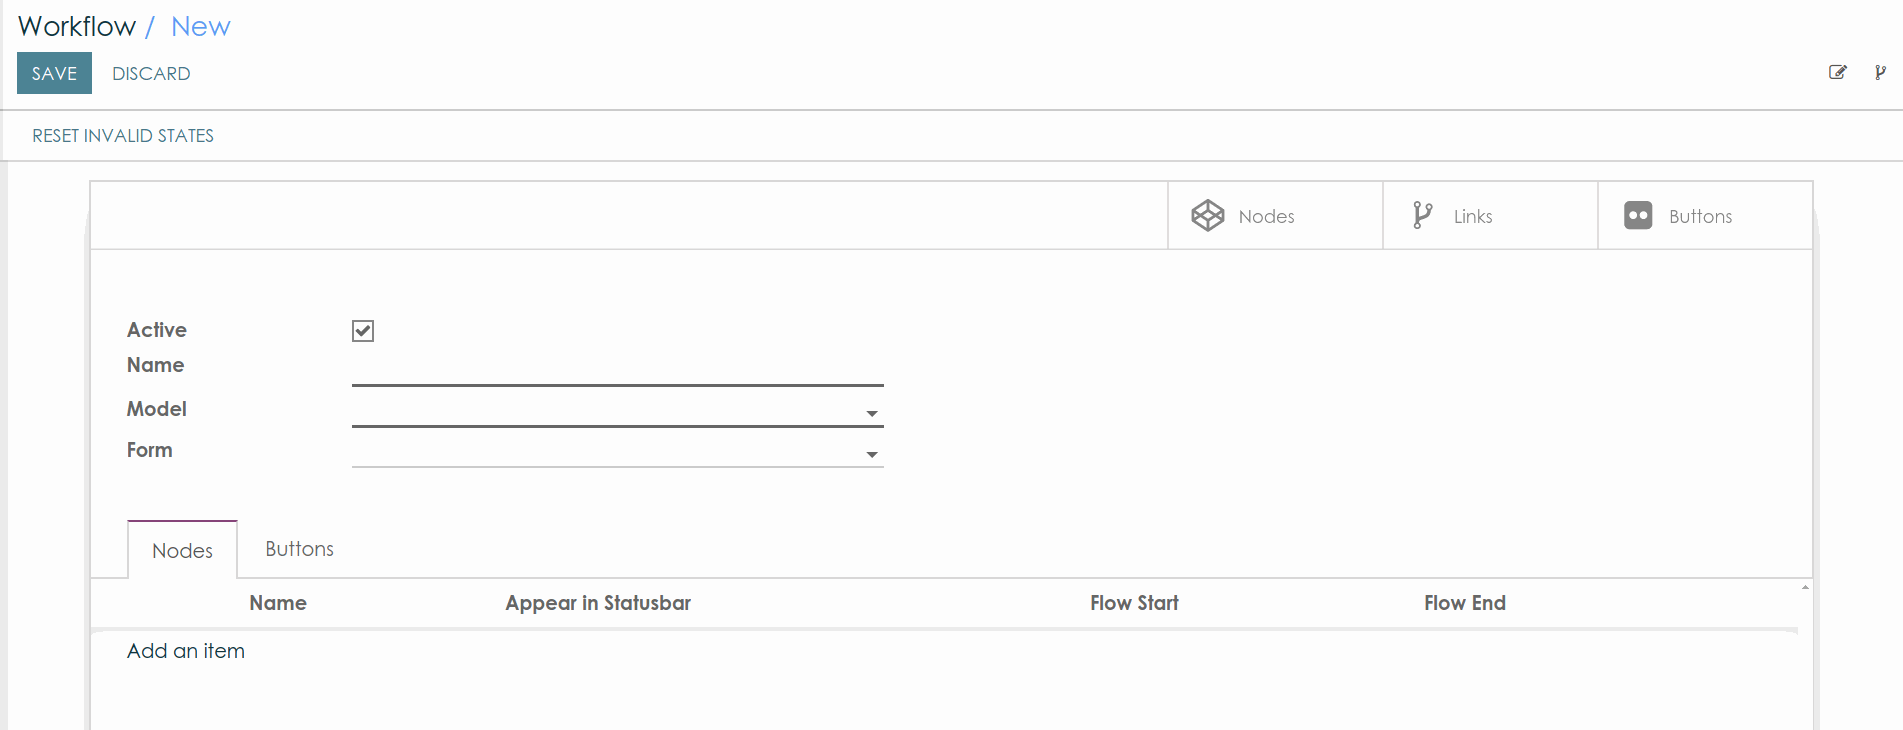
When you click "Create" button and a new screen will popup. Fill in the mandatory fields to create the workflow (Mandatory Fields: Name, Model). It is recommended that a brief explanation regarding the duty of the workflow is written in the "Name" field. Then, select the desired Model for the workflow from the model field, or create a custom made model. Save your workflow by clicking the 'Save' button located on the top left.
Everything needed to create a workflow is so simple and fast
How to create state(s) in workflow?
After filling in the mandatory fields and saving the workflow, edit workflow mode can be entered by clicking the "Edit" button or double-clicking anywhere on the current screen.
(Note: Workflow must be saved before states or buttons can be added)
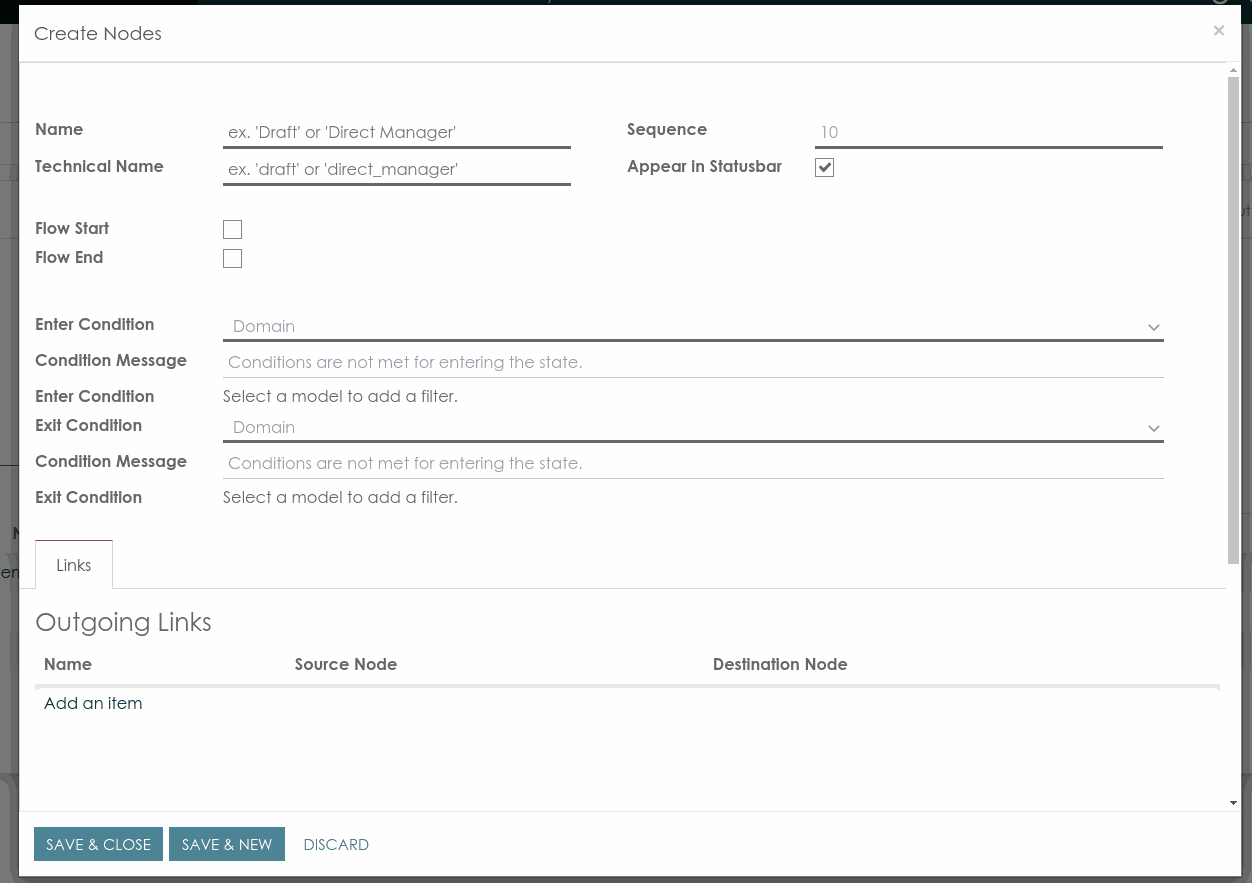
Clicking "Add an item" on the Nodes Tab will open a popup screen where Mandatory fields are: Name, Technical Name, Sequence, Enter Condition and Exit Condition. However Sequence, Enter Condition and Exit Condition fields will be filled by default and can be changed later according to your customization. In the "Name" field, the name that will appear on the User-Interface side should be written. The system will automatically create the Technical Name field according to the Name entered, but which can also be changed later. New state will have been created once the 'Save and Close' button at the bottom of the screen is clicked.
How to add button(s) to the workflow?
Once the workflow is saved, cick the "Edit" button or double-clicking anywhere on the current screen to enter the edit workflow mode.
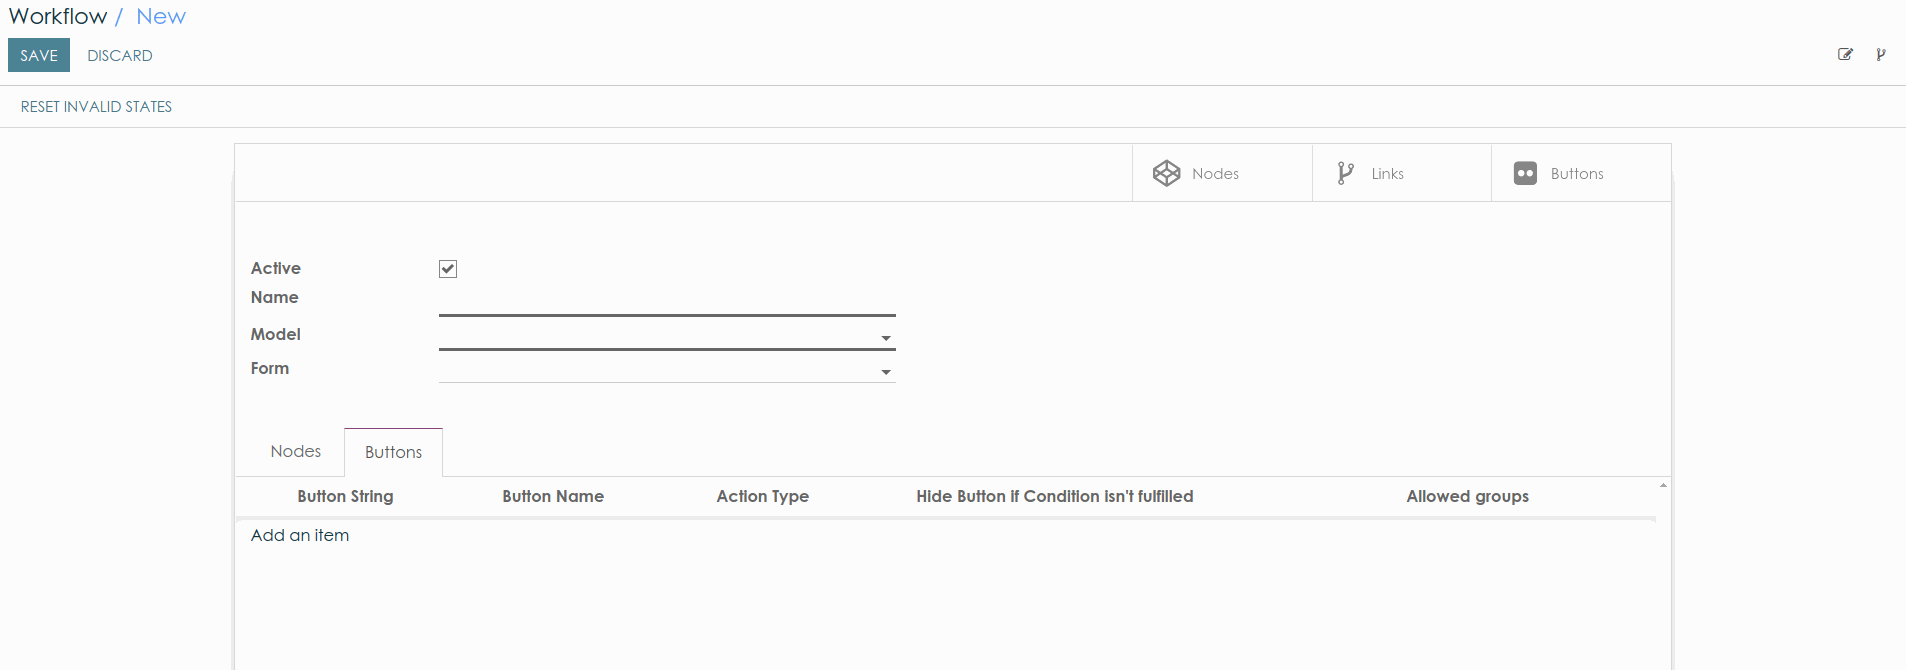 Clicking "Add an item" on the Buttons Tab will open a popup screen where Mandatory fields are: Sequence, Button Name). Once these fields are filled in and the "Save & Close" button is clicked, a new button will have been created.
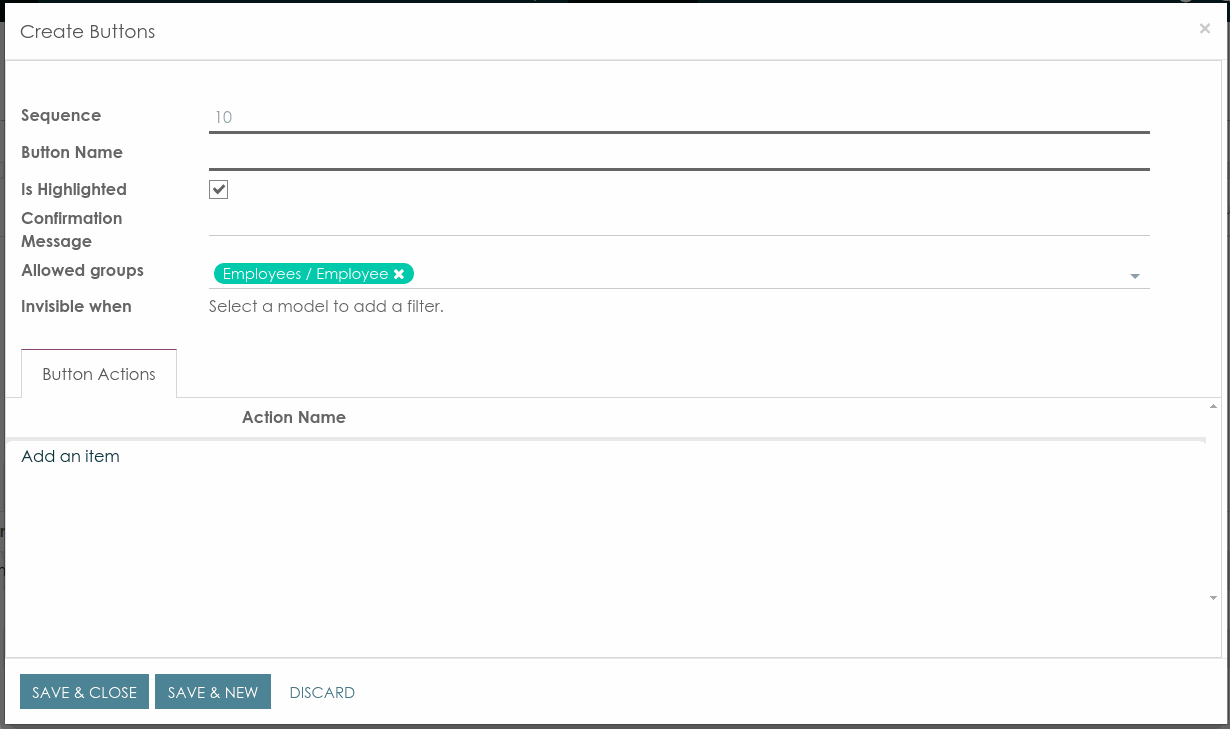
How to add an action to the button that has been created?
>Once the button is created, an action needs to be written for it to perform when it is clicked. For this, the button needs to be opened in Edit mode. In the window that opens, click 'Add an item' in the 'Button Actions' section.
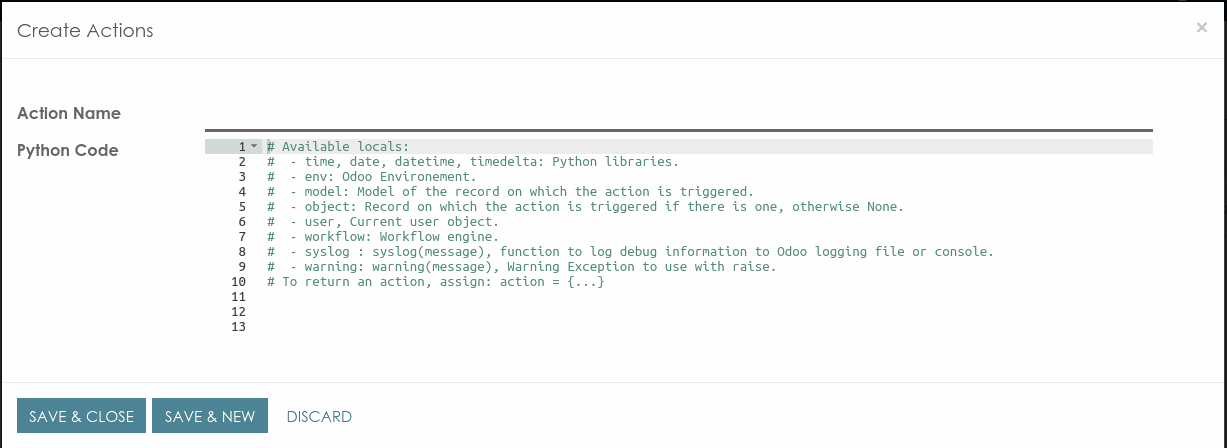
A new window will open. In the "Action Name" field, briefly explain the action which will be written. The new Python code is then written in the 'Python Code' field section. language. Follow the link for some examples of Button action codes. Examples of Button Action
